Dystopian Wars
X-Cam
X-Cam concept by
Russ Wakelin
Adapted for Dystopian Wars by
Craig Gallant
With additional edits by
Robert Dijkman Dulkes
Overview
It is a time for Strength! The world may burn, but the strong will survive!!
Welcome, Commander. You have been dispatched to this area to bolster our defenses and seek any possible weaknesses in the deployed strength of our foes. Success will be rewarded with greater responsibilities and glory, while defeat will see your name cast upon the dust bin of history. Our position in this area depends upon you and you alone; do not fail us.
Objective:
To fulfill your orders you must undertake missions. Each mission is a game against an opponent or opponents. There are three basic types of missions:
- Recon Mission: Players engage in small battles to gain Recon points. Recon points represent ‘intelligence’ your forces have gained about the Command Area, enemy positions, and assets.
- Strategic Missions: Once you have enough Recon points you may spend them to challenge other players to larger battles to gain Strategic points. Strategic points represent your offensive position in the area. The more Strategic points you have, the better positioned you are to make a critical strike and establish control.
- Control Missions: Players that have gained a strong strategic position are now ready to coordinate large engagements, such as Stronghold Assaults and Force Superiority battles, to gain Control points. Control points represent how much dominance your forces have in the area.
Recon points and Strategic points are simply a means to an end. Throughout the X-Cam players will gain and spend these points. You will always be returning to Recon missions to gain back Recon points, and spending those points on Strategic missions to gain Strategic points. These, in turn, are spent on Control missions to gain Control points as well as to improve your situation in lower-priority battles.
Unlike Recon and Strategic points, you don’t spend Control points. Control points increase your rank, give you access to more powerful abilities, and most importantly: The first player to gain 3 Control points will win the X-Cam. If two (or more) players both get to 3 control points within a week of each other, they fight a large scale Grudge Match scenario to break the tie.
Declare Your Allegiance
When you sign up for the X-Cam you must select which Power you will serve. If you start playing the X-Cam and find you don’t like your choice, you may change it at any time by starting over. Starting over means that all your points are reset to zero.
Players serving the same nation do not work together. They are opponents; warring factions within a single nation. There are no teams in the X-Cam.
How you play:
1. Challenge an opponent to a mission. You may only choose a mission that you can afford based on your current status in the X-Cam. (see mission costs)
2. Roll scenario on the table for the chosen mission and choose a table/terrain type.
3. Determine Attacker and Defender based on scenario and mission rules.
4. Bid to alter Force Point Level.
5. Bid to alter terrain on the battlefield.
6. Spend Recon and/or Strategy Points based on mission cost and bids.
7. Build your forces.
8. Play the game.
a. At the end of each round, but not at any other time, check to see if one of the game ending conditions defined in the scenario has been triggered.
9. Determine the winner based on scenario victory conditions.
10. Gain Recon, Strategy and/or Control Points based on scenario rewards.
11. Report your results.
Terrain:
Terrain:
Dystopian Wars allows for fighting in all three ‘battle spaces’ at once. Players should decide amongst themselves which spaces they would like to include in each game based upon the forces they have available and their own tastes, and design the table accordingly. Most missions support land tables, sea tables, and mixed tables wherever possible, although some may only allow one type or the other.
There will be 2d6-2 (re-roll once if the result is 0) terrain pieces deployed for each game. Once the number is determined, roll 2d6 to see who goes first and alternate choosing BUT NOT PLACING pieces from your local collection of terrain. Players then alternate placing terrain from this pool (note: you are NOT limited to the pieces you selected for the pool) by rolling a single d10 near the center of the board. The die result is the rough percentage of distance towards the table edge, in the direction of the pointy top of the d10, where the piece chosen will be placed. On the result of a '0' the player may choose to put the piece in the center of the table, at the table edge (along the line indicated), or not place the piece at all, thereby removing it permanently from the pool. If any piece would end up overlapping another (where it doesn't make sense), or within 6" of another piece, simply move the new piece the minimum distance required so that it is outside of 6".
Spending Strategy Points:
--Altering the Force Point Level--
“We’ll fight them, but we’ll fight them on our terms.”
Each mission has a default point level, but players may spend Strategic points in an attempt to alter this level. Each player secretly records a number on a piece of paper. The number can be positive, negative, or zero and represents an increment of 50 by which you are trying to shift the default Force Point level. After both players have written down their numbers they are revealed and added together. The result is how much the point level shifts to a maximum of 200. Example: Bill and John are about to play a Recon Mission. Bill writes down +3 on his paper. John writes down -2. The players reveal their papers and add them together: +1. The game is played at the default level +50. Bill has spent 3 strategic points and John has spent 2. REMEMBER: All strategic points spent are lost, REGARDLESS of how much the point level is actually adjusted.
--Altering Terrain Placement--
“A true general counts the mountains, the rivers, and the grass in the field as his allies.”
Quite often knowing the local terrain can mean the difference between victory and defeat. In any battle where the terrain is determined randomly, each player may opt to secretly bid Strategy Points towards some control over the battlefield. Each player writes down a number of Strategy Points they are spending on controlling the location of the battle. These numbers are then revealed and compared with each other. The winning player consults the following chart and may claim whatever advantages their bid has earned them. Regardless of who wins or loses, all points that were bid are lost.
Won by how many points: | Result |
0-4 | Both you and your opponent are too cagy to be drawn into a killing field. Determine terrain as normal. |
5-9 | You may select a single piece of terrain from the Pool before placement begins. You may choose, at any time during terrain placement, regardless of die rolls, to place that piece of terrain in any empty 12” square on the table. You may, if you wish, not place this piece at all, thereby denying it to the enemy. |
10-14 | You may either: A) Choose TWO pieces of terrain, as above. or B) Wait until terrain deployment is complete and then remove a single piece of terrain from the table. |
15 or more | You may either: A) Choose THREE pieces of terrain, as above, or B) Wait until terrain deployment is complete and then remove TWO pieces of terrain from the table. |
--Benefit of Owning Control Points--
“We are pleased with your progress. New resources are now at your disposal.”
Players with Control points have impressed their commanders and can now call upon expanded resources. For every Control Point you possess, your Force Card hand is expanded by 1. This means that if you have 2 control points, your maximum hand is now 7, and you will always have at least 3 (as when you lose your last squadron you’ve lost the game, no matter how cool you are). You may NEVER draw more than 5 cards at a time (ie: you will start the game with a maximum of five cards).
Recon Missions:
You need more information on what is out there. Deploy forces and scout the area. Report back with your findings. You must get home with the information at all costs.
Cost: Free.
Opponent: Anyone! 2-4 players may participate in a single Recon Mission.
Default Force Point Level: 400.
Attacker/Defender: The Challenger is the Attacker, or roll to decide.
Force Organization: Rulebook requirements to force organization apply with the following exceptions:
· There are no Commodores.
· There is no maximum % of small models.
· There is no minimum amount of squadrons in any size category.
· Large models are limited to a maximum of 1 per force.
· No Massive models are allowed.
· Instead of 10 tiny flyer tokens, players receive 2 tiny flyer tokens per squadron of models, but no more than 10 tokens can be gained this way, and no more than two may be designated as reconnaissance planes.
Recon Scenario Table:
If 2 Players, roll 2D6 and consult the table below
Roll | Scenario | Notes |
2-6 | Reconnaissance | Strange vehicles have been sighted, scout the area and report your findings. |
7-8 | Meeting Engagement | While on patrol, enemy sighted! |
9-10 | Ambush | A patrol has stumbled upon an enemy force with vital information. They’re out numbered, but surprise is on their side. |
11-12 | Escape to Base | Your patrol is returning with vital information and has been jumped by the enemy. Badly outnumbered, you MUST get back to base! |
Multi-player option:
More than two players may choose to play a Recon Mission. In that case, the mission will be the “Vigorous Diplomacy” scenario.
Rewards:
· All players gain Recon Points equal to scored VP/100 (round up).
· All players gain Recon Points equal to the full value of each surviving model /400 (round up).
· All players gain 3 Recon Points for fielding a fully painted force.
· Winner gains 5 Recon Points.
Strategic Mission:
You’ve gathered information on the critical locations of enemy supplies and key vessels. It’s time to move in and hit them where it hurts.
Cost: Challenger pays 10 Recon Points, Defender pays nothing.
Opponent: Any one other player.
Default Force Point Level: 800.
Attacker/Defender: The Challenger is the Attacker.
Force Organization: Rulebook requirements to force organization apply with the following exceptions:
· Massive models are limited to a maximum of 1 per force.
· Before building your forces roll a die. On a 1-3 each force has a Commodore present, on a 4-6, there are no Commodores present.
· Instead of 10 tiny flyer tokens, players receive 2 tiny flyer tokens per squadron of models, but no more than 10 tokens can be gained this way, and no more than two may be designated as reconnaissance planes.
Strategic Scenario Table:
2D6 and consult the table below
Roll | Scenario | Notes |
2-3 | Convoy | The enemy is moving key resources in a nearby convoy. It is time to strike. |
4-6 | Epic Conflict | A fluid combat situation where only the master tactician can prevail. |
7-8 | Assassination | Reports indicate the enemy is relying heavily on a particular vessel. We now know where it is… |
9-10 | Running the Gauntlet | If we can just get our heavy craft into position, there will be no stopping us. |
11-12 | Land Grab | You can’t own the area unless you control the key strategic points. |
Multi-player option:
More than two players may choose to play a Strategic Mission. Each player pays 10 Recon Points. Roll 1d6. The mission will either be Land Grab (1-3) or Fields of Blood (4-6). All players count as “Defender” for purposes of rewards.
Rewards:
· Challenger gains Strategy Points equal to scored VP/100 (round up).
· Defender gains Strategy Points equal to scored VP/200 (round up).
· All players gain Recon Points equal to scored VP/200, or VP/100 in a multi-player game (round up).
· All players gain Recon Points equal to the full value of each surviving model /400 (round up).
· All players gain 3 Recon Points for fielding a fully painted force.
· Challenger gains 5 Strategy Points for winning.
· Defender gains 2 Strategy Points and 3 Recon Points for winning.
Control Mission:
We have them now! You have scouted out enemy positions, established a strong strategic presence, and you are now ready to strike. Time to move in the big guns.
Cost: Challenger pays 25 Strategy Points, Defender pays nothing.
Opponent: Any one other player with at least 20 Strategy Points or at least 1 Control Point.
Default Force Point Level: 1200.
Attacker/Defender: The Challenger is the Attacker.
Force Organization: All rulebook requirements to force organization apply without exceptions.
Control Scenario Table:
The scenario played is based on the Challenger’s current Control points (CP)
Challenger CP | Scenario | Notes |
0 | Battlefield Supremacy | Stage 1: To control the area we must first establish dedicated supply lines. We know it, and they know it. |
1 | Stronghold Attack Play “Clash of Arms” scenario but defender must take at least 3 fortifications. Attacker automatically loses unless the fortifications are all below half HP. If all enemy fortifications are at ½ HP then score victory points as normal to determine winner. If all enemy fortifications are destroyed, Attacker automatically wins. | Stage 2: Increase your control by removing key enemy observation posts and strongholds. |
2 | Home Base Assault | Stage 3: Eliminate enemy presence in the area by decimating their primary assets. |
Missions


Mission Objectives:


Ambush
A brave strike force has laid a trap for a much larger enemy force. In a daring raid that will test all of their skills and abilities, they must inflict the most damage possible and then withdraw before the enemy can bring their larger numbers to bear.
Forces: The Attacker has 75% of the Force Point Level, the Defender has 100%.
Preparations: The Defender deploys all of their forces within 12” of the center of the table facing one short table edge. The Attacker chooses an edge parallel with the direction of travel of the defending force. The Attacker may place any terrain they wish bordering their edge. All other terrain is generated randomly.
Scenario Special Rules: The Attacker brings their force on by activating one squadron at a time, moving and shooting as normal. Defending Tiny Flyers may leave from any board edge except the Attacker’s, Attacker’s must leave from their original board edge.
Game Length: The game lasts until the Attacker has no models left on the table, either through withdrawal (moving off the board edge) or enemy action.
Victory: Victory Points are scored as normal, with the exception that the Defender gains no VP for Attacking models that leave the table. The winner is the force that scores the most VP.
Assassination
Sometime, in war, an enemy craft must die no matter the cost. An entire enemy force may be brought to action solely to destroy a single vehicle. Maybe force intelligence believes it carries an important personage, or experimental equipment, or maybe it has been too successful, and it’s continued existence damages morale. For whatever reason, the Powers that Be have decided that this vehicle must die.
Forces: Attacker and Defender have 100% of the Force Point Level.
Preparations: Terrain is determined randomly. Deployment zones:

Scenario Special Rules: The Defender deploys his entire force first. The Attacker secretly chooses a single enemy model after deployment. This model is worth double its normal Victory Points if it is destroyed or taken as a prize. The Defender automatically wins initiative in the first turn. Alternately, players alternate deploying forces and each player designates a model from the enemy as a target for assassination.
Game Length: 4 turns or until one force has no models left on the board.
Victory: Victory Points are scored as normal, with the exception noted above. The winner is the force that scores the most VP.
Battlefield Supremacy
The time has come to crush the foe decisively! Massive forces have been brought into position. When the guns fall silent this day, there will be no doubting who may call this area his own.
Forces: Attacker and Defender have 100% of the Force Point Level.
Preparations: Terrain is determined randomly. Draw a line from one corner to the midline of the opposite long table edge. This and the mirrored area in the opposite corner are the deployment zones.

Scenario Special Rules: None.
Game Length: 4 turns or until one force has no models left on the table.
Victory: Victory Points are scored as normal. In addition, divide the board into 2’x2’ squares. A player earns a bonus 100 VP for each 2’x2’ square in which they have the only active, unbroken models. The winner is the force that scores the most VP.
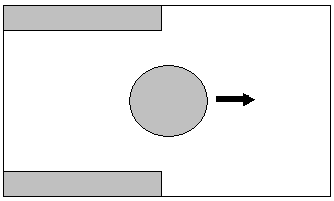
Convoy Duty
Although the history books speak most often of the daring force actions and skies darkened with the columns of smoke from the burning forces of the defeated, quite often wars are won or lost based on lines of supply. The bravest crew in the strongest ship in the world cannot win if they have no food, water, or ammunition.
Forces: The Attacker has 50% of the Force Point Level, the Defender has 100%. In addition, the Defender has a number of Transports equal to half the total number of squadrons in their force. These models form a single squadron of their own, but do not generate a STAR card, and STAR cards cannot be played upon them.
Preparations: Terrain is determined randomly. One of the short sides of the table is designated as the destination edge. The Defender deploys in a 10” circle in the center of the table. The Attacker moves each squadron onto the table from either long edge, at least half a table length away from the destination edge, in their first activation.
Game Length: The game lasts until all Transports have left the table or have been destroyed.
Victory: Victory Points are scored as normal. In addition, the Attacker gains 100 VP for each Transport he manages to sink, and the Defender gains 200 VP for each Transport that escapes off the opposite short table edge. The winner is the force that scores the most VP.
Transport:
DR: 4; CR: 6; Mv: 8”; HP 4; AP 2; AA 4; CC 3; RR 0; P/S guns (S) 3, 2, 1, 0
Epic Conflict
Sometimes the objectives in battle shift quickly, and what seemed greatly important one moment is trivial the next. Only the greatest commanders can follow the elusive thread of victory in the very heat of a battle of this sort.
Forces: Attacker and Defender have 100% of the Force Point Level.
Preparations: Terrain should be determined randomly. Forces will deploy along opposite table edges, within 12” of that edge. In addition, players will take turns placing 3 objectives each. The first objective placed MUST be in contact with their board edge.
Scenario Special Rules: Objectives (can be drilling platforms, towers, tokens, etc), count as being Indestructible Massive models with no other stats. You “control” an Objective as long as you have at least one AP on the Objective, or the only model within 6” of it.
Game Length: The game ends at the end of turn 3, 4, or 5 when a player has achieved 2 Mission Objectives. Otherwise, at the end of turn 4 roll a die: on a 5 or 6 the game is over, any other result the game continues. At the end of turn 5 the game ends on a roll of 3, 4, 5 or 6. The game automatically ends after turn 6 otherwise.
Victory: The player with the most Mission Objectives wins. In case of a tie, the player with the most VP wins. Victory Points are scored as normal. In addition, each players earns a bonus of 100 VP for each Mission Objective he has achieved at the end of the game.
· Control 2 Objectives on foe’s side of the table;
· Control foe’s Home Edge Objective;
· Destroy foe’s most expensive Squadron;
· Control all 3 Objectives on your half of the table;
· Foe has no models on your half of the table.
Escape to Base
Sometimes discretion is the better part of valor. Caught away from your home base by a larger enemy force, your taskforce must attempt to reach safety before the superior numbers of the foe can overwhelm you.
Forces: The Defender has 75% of the Force Point Level, the Attacker has 100%.
Preparations: A Large hill, island, or other base-like terrain piece is placed 6” from the center of one short table edge. This island is Home Base. No other terrain is placed. The Defender deploys his entire force 24” from the opposite short board edge and the Attacker deploys half of his strength, including all Large and larger models, in 6”x12” areas at the corners of the same board edge. Remaining units enter in turn 2 from a point 24” from the edge, each squadron from a randomly chosen side. The Defender’s Tiny Flyer tokens may refuel/rearm at Home Base. The Attacker’s Tiny Flyer tokens may refuel by flying off of any board edge.

Scenario Special Rules: Home Base counts as a Standard Bunker, but all AD are at -1 to hit.
Game Length: The game ends when all the Defenders models have reached Home Base, or after 6 turns.
Victory: Victory Points are scored as normal. In addition, the Defender gains the full value of each model that reaches Home Base in VP, regardless of what damage it has taken. In order to reach Home Base a model must make contact with the hill/island/base, at which point it is considered to have entered the safety of the underground hidden base and is removed from the game. The winner is the force that scores the most VP.
Fields of Blood
Inspired by “Sturginium Derrick Control”
A mission from the Spartan Games forums by Vertrucio
Across the globe there are no more important resources than the scattered Sturginium mining and refinery plants that haunt the loneliest stretches of waste and desert known to man. The elusive element’s instability ensures that areas set aside for its processing are far from habitation, and often, protection…
Forces: For 2 – 4 players. All opponents have 100% of the Force Point Level.
Preparation: Terrain is determined randomly. In addition, a single Sturginium drilling platform is placed in the center of the board. Players then take turns placing 2 more platforms each, one at a time. No platform can be placed within 12" of another, or within 6” of terrain. After all platforms are placed, determine deployment zones by rolling a die: low number: 8" deep 24” long in the center of the edges, or 8" deep, 12" long corners.
1-3 4-6

Scenario Special Rules: Platforms have 1 AP and 1AA each and count as Massive models. The AA is controlled by the player with the most AP on the platform. Once a player has removed all other AP from a platform he counts as controlling it even if he removes all his AP, but then the platform is unprotected and can be taken without a fight by another player. Tiny Flyers may refuel by leaving the board at their sides’ deployment zone.
Game Length: The game ends at the end of turn 4, or when a single player controls 3 platforms in a 2 player game, 4 platforms in a 3 player game, or 5 platforms in a 4 player game.
Victory: The player controlling the most platforms at the end of the game wins. If there is a tie, the tying player with the most VP wins. Victory Points are scored as normal. In addition, each player earns 100 VP per platform he controls at the end of the game.
Home Base Assault
There comes a time when victory in the field is not enough. To truly defeat the enemy you must leave him no base from which to operate. Once a commander has built up sufficient forces and nerve it is time to dare the ultimate objective: the enemy’s home base itself.
Forces: The Defender has 70% of the Force Point Level, the Attacker has 100%.
Preparations: A large island or hill is placed 6” from the center of one short table edge. Home Base is located on this island. Other terrain is generated as normal but the Defender places it all, except for pieces won in a Strategy Point bid. The Defender deploys his entire force within 12” of Home Base, and the Attacker enters in turn 1 from the opposite table edge.
Game Length: 6 turns or until the base has been destroyed or reduced to 0 AP.
Victory: If the Defender has more AP in the base than the Attacker at the end of the game, he wins. If there are no Defender AP and at least one Attacker AP in the base at the end of the game, or if the bunker is destroyed, the Attacker wins. Any other result is a tie. Victory Points are scored as normal. In addition, the Attacker earns a bonus of 50 VPs for each destroyed Gun Emplacement. The winner earns 10 Strategy Points in addition to the regular rewards for winning.
Gun Emplacements: The Defender has a number of Gun Emplacements (gun/rocket/tesla/torpedo towers) equal to half the number of Squadrons of the Attacker.
Home Base: A Massive Bunker with the following profile:
DR 8; CR 12; MV 0”; HP 10; AP 12 ;AA 8; CC 7; RR 0.
360 Turret (P): 13 – 8 – 6 – 3
270 Turret (P): 14 – 10 – 8 – 6
With all the MARs of a Bunker, plus Icon and a Shield Generator. It also counts as a Radio Tower
Land Grab
Ships are powerful, but sometimes you must control the tiny islands of the deep waters to control the waves. You have been entrusted with the landing of troops on a target island, but you are not the only force trying to claim the island as your own.
Forces: For 2 – 4 players. All forces have 100% of the Force Point Level.
Preparations: There is a medium/large island in the center of the table, otherwise, terrain is determined randomly. If there are only 2 players, both forces are deployed along opposite board edges, 8” in. If 3 or 4 players, deploy in 10” squares in the corners.
Scenario Special Rules: The island is home to a small forward base. The base itself is well-dug in and cannot be damaged. However, it may be ‘boarded’ as normal. It has the following defensive statistics by Force Point category:
Force Point Level < 600 - AP 5; AA 3
Force Point Level 600-800 - AP 6; AA 4
Force Point Level > 800 - AP 7; AA 5
All AP landed on the island must be tracked, and may, in their own activation, launch an assault on the AP of any other single player, or the island’s Defenders. Each time anyone activates on the island roll a d6. On a 6 the island’s Defenders will assault the AP of whichever nation has the most currently on the island, distributed as evenly as possible.
Game Length: The game ends at the end of any turn when one player has more AP on the island than any other player.
Victory: The force with the most AP onto the island by the end of the game wins.
Meeting Engagement
Every war is defined by a few massive battles that are forever memorialized in the history books. Behind every one of those battles, however, are hundreds of smaller clashes that only matter to those who live and die by them.
Forces: Attacker and Defender have 100% of the Force Point Level.
Preparations: Terrain is determined randomly. Deployment zones are opposite edges, 12” in and 12” from the neutral sides.

Scenario Special Rules: None.
Game Length: 4 turns or until one force has no models left on the table.
Victory: Victory Points are scored as normal. The winner is the force that scores the most VP. A bonus of 2 Recon Points is awarded for destroying the enemy Commodore.
Reconnaissance
Of all the commodities of victory, none is as important as intelligence. You must know who and what you are fighting or you will be ill prepared to defeat the foe. Recent enemy activity in your command area has worried your superiors, and you have been sent out to identify these newcomers and, if possible with your small task force, eliminate them.
Forces: The Attacker has 75% of the Force Point Level, the Defender has 100%.
Preparations: Terrain is determined randomly. The defending player sets up his force in a zone at least 12” away from each table edge. The attacking force enters in turn one from any one table edge.
Scenario Special Rules: The Attacker is trying to gather specific information about the enemy vehicles. To do this, they must get in close enough for experienced crewmen to study the model’s power plant, weapon configurations, etc. To study a model the Attacker may dedicate any amount of its normal AD from any (P) or (S) attacks to focus on the enemy model. This does not count as an attack, and cannot damage the target in any way. If the model meets or exceeds the target’s DR it has achieved a partial success. If it meets or exceeds that target’s CR, it has achieved full success. The Attacker may try and re-scan a model class to upgrade from a partial to a full success. Record which enemy model classes have been studied. There is no penalty for Attacking models that leave the board. Defending models that flee yield half their VP.
Game Length: 6 turns or until one force has no models left on the board.
Victory: Victory Points are scored as normal. In addition, the Attacker gains VP for each model type that was scanned, ½ VP for a partial success and full VP for a full success. The Attacker may only gain VP in this way for each enemy model class once. The winner is the force that scores the most VP.
Running the Gauntlet
A daring push through enemy territory could turn the tide in the war. But first, the vehicles need to get where they’re needed most.
Forces: Attacker and Defender have 100% of the Force Point Level. The Attacker must have at least one Large or Massive surface model. The Defender cannot have more than one Large or Massive model.
Preparations: Terrain is determined randomly. One of the short sides of the table is designated as the Attacker’s destination edge. The Attacker deploys in a 24” circle in the center of the board. The Defender moves each squadron onto the table from anywhere along a 24” long stretch of a random long table edge butting the Attacker’s destination edge. Roll up which table edge for each squadron as they activate.

Game Length: The game lasts until an Attacking Large or Massive surface model leaves the destination edge, or until there are no more Attacker Large or Massive surface models left.
Victory: If any Large or Massive models escape, the Attacker wins. If not, he loses. Victory Points are scored as normal.
Vigorous Diplomacy
The stronghold of a neutral power has been approached by several ‘delegations’ at once. Upon seeing these forces approach in strength the commander of the stronghold has closed his gates tight and decided to await the outcome before committing his nation to a course of action.
Forces: For 3 – 4 players. All forces have 100% of the Force Point Level.
Preparations: An island with a tower or a sea tower, or a large fortress on a hill is placed in the center of the table. No other islands or hills may be used, but otherwise terrain is set up as normal. Deployment zones are 8” squares at the 4 corners of the table.
Scenario Special Rules:
Neutral Stronghold: The stronghold has a DR of d6, CR of its DR+2, and HP of 2d6. Structural stats are not established until it has been shot at for the first time. The structure will shoot after each round of player activations, with 2d6 AD, at the largest (highest VP value) model within range band 2. If multiple models qualify, the structure targets the closest.
Experimental Radar: Any model may focus some efforts in contacting the commander of the stronghold to ascertain the strengths and prospects of an alliance. Any model may dedicate any amount of its normal AD from any (P) or (S) attacks to focus experimental radar on the structure, just as if shooting. This does count as an attack, but cannot damage the stronghold in any way. If the model meets or exceeds the established DR of the stronghold it has achieved a partial success. If it meets or exceeds the CR of the stronghold, it has achieved full success and knows everything there is to know about this decrepit edifice of equivocation.
Game Length: The game lasts 4 turns, or until the Stronghold is destroyed, or until only one player’s models are left on the table.
Victory: Victory Points are scored as normal. In addition, players score VP for scanning the stronghold, 100 VP for a partial success, or 200 VP for a full success. The VP for scanning may only be scored once. If the Stronghold is destroyed the player whose force took the killing shot loses 2d6 x 10 VP if it did not successfully scan the Stronghold at all before destroying it.
No comments:
Post a Comment